

How To Repair Hole In Bike Tire
Eugene is a keen recreational cyclist who likes mountain biking in the hills and forests of County Wicklow, Ireland.
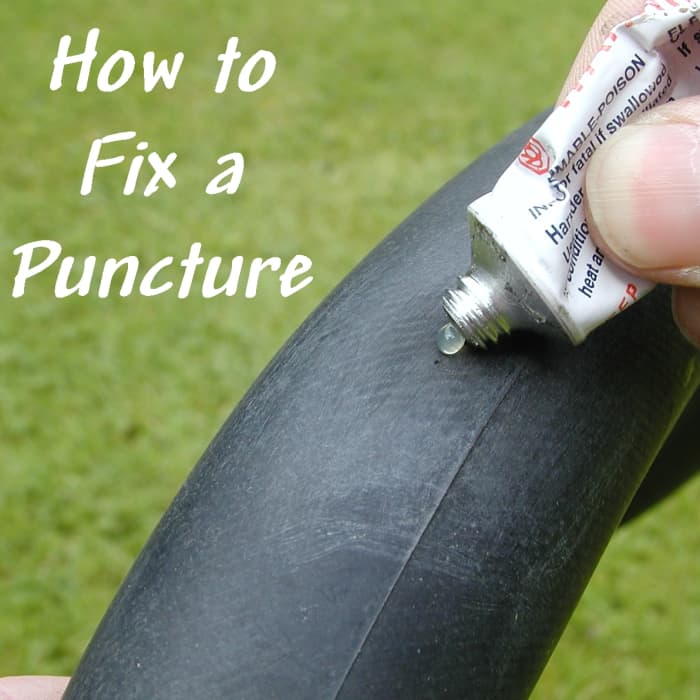
How to repair a apartment bike tire.
© Eugene Brennan
How to Mend a Puncture on a Bike (Flat Tire)
You will inevitably get a punctured tire (tyre) at some stage, merely patching an inner tube is quite simple, requiring few tools. It should exist possible to perform a repair in between 30 to 40 minutes. It is an essential skill if you cycle a reasonable distance and don't want to accept to walk home!
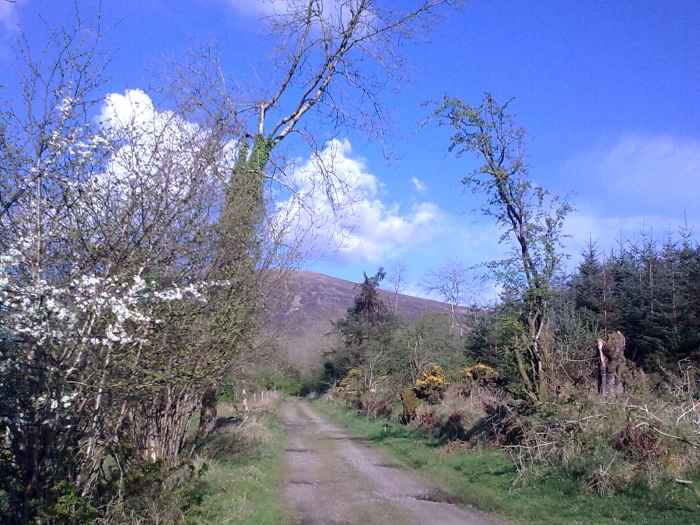
Gorse and whitethorn thorns on trails like these have no respect for tires!
© Eugene Brennan
What Causes a Flat Tire?
Sharp objects such as drinking glass, nails and tacks. In the countryside thorns from bushes such as bramble, blackthorn, whitethorn and wild rose tin can also crusade flats. In countries such every bit the United kingdom of great britain and northern ireland and Ireland, hedgerows adjoining roads are a common sight. These were often grown equally a bulwark to continue in livestock and typically consist of whitethorn and blackthorn, as well as other trees and bushes. When hedges are cut, thorns frequently litter the road surface and present a hazard to tires.
Also, when the tire of a bike hits a pothole, the tube tin get pinched between the tire and wheel causing what is known equally a compression puncture. Ideally, you should exist vigilant and watch the road surface to avert punctures and damage to the wheel and rim in the outset place.
10 Steps to Repair a Cycle Puncture
- Detach the brake cable
- Remove the wheel
- Release the air from the tube
- Marking the tire
- Remove the tire from the rim
- Remove the tube
- Detect the hole in the tube
- Locate what caused the puncture
- Patch the hole
- Put everything back together
See below for further details.
You lot only demand a few tools costing a few dollars to repair a puncture.
- Wrench. A single tool is available that can cope with all the standard nut sizes on a bicycle
- Tire Levers. These are used to lever off and dissever the tire from the rim
- Puncture Repair Kit. Comprising patches, mucilage, sandpaper and chalk
- Pump. You lot're going to need this to pump the tire back upwardly—unless you have a strong pair of lungs!
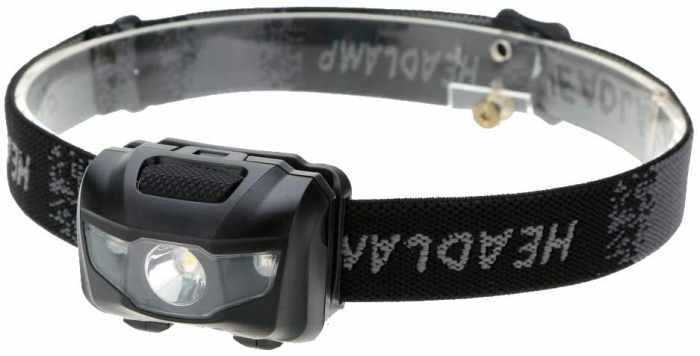
- Head Torch. Useful if you lot unfortunately become a puncture at dusk and terminate up working in the night (which happened to me recently). You lot can utilise the front light from your cycle and effort to clamp it somehow so that it directs light where needed, however, an LED headlight that takes AAA batteries or is alternatively rechargeable via a USB cablevision is a much better choice.
There are another dozen or more tools which it's wise to accept with y'all when cycling. Check them out in my other guide: twenty Essential Wheel Tools to Bring on Your Ride.
Puncture Repair Kit
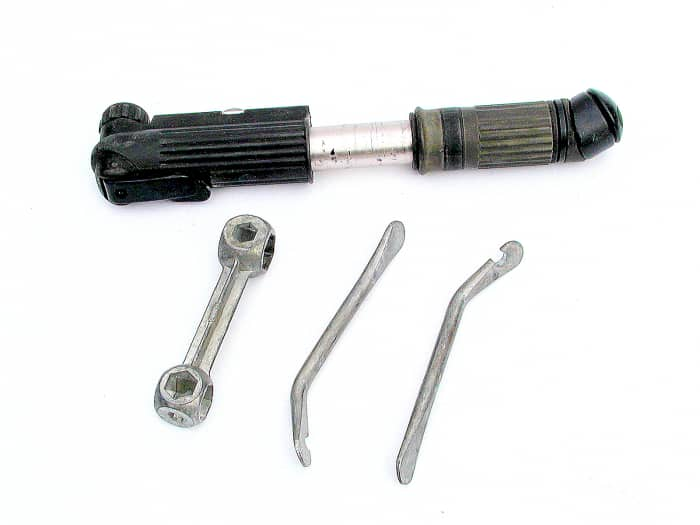
Puncture Repair Tools. A Pump, wrench for different sized nuts and tyre levers.
© Eugene Brennan
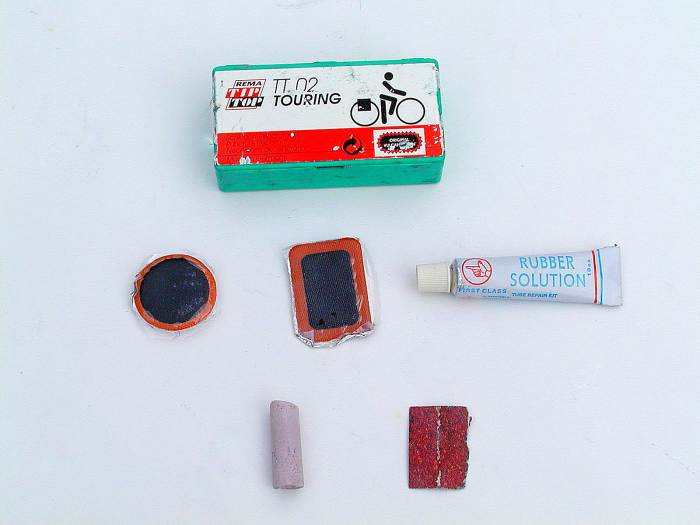
Patches, rubber glue, chalk and sandpaper
© Eugene Brennan
Headlamp
This Adaskala headlamp with a 3W LED available from Amazon is an essential slice of kit if you go caught out in the dark and have to repair a flat. It has a high output white LED and two red LEDs with iv modes of functioning. The reason I recommend this type is because it takes three AAA batteries which are universally bachelor.
Likewise, the batteries fit in a compartment in the lamp itself and not a secondary compartment on the strap at the back of your caput, connecting to the front with wires. The disadvantage of those types is that the wires can grab in due east.g. branches while working. Rechargeable headlamps are likewise an option that can exist charged from a USB wall charger or laptop.
3W Head lamp
Amazon
Roll to Keep
Read More From Skyaboveus
How to Repair a Puncture in x Steps
Unless you are replacing the tube, you don't have to remove the rim from your bicycle to patch a hole. Yet, it is much easier to manipulate the tube and locate the puncture if you do so.
Step 1: Detach the Brake Cable
First, disassemble the end of the restriction cable where it attaches onto the slot on the brake arms.
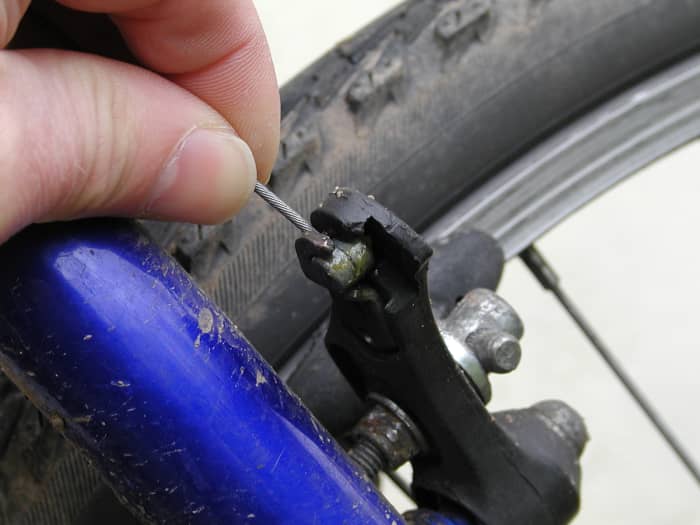
Removal of restriction cable from traditional center pull cantilever brake. Grip the cable tightly, button down on information technology and release the lead stop on the cablevision from the housing on the arm.
© Eugene Brennan
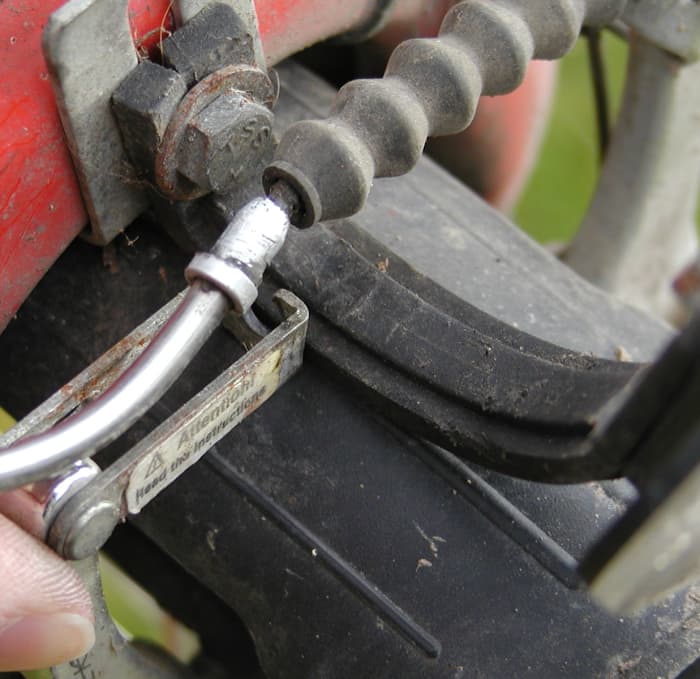
Removal of brake cable from 5-brake also known equally side pull or straight cantilever brake. Hold the linkage on the restriction arm, pull the brake cable sleeve and lift it articulate of the linkage.
© Eugene Brennan
Step 2: Remove the Wheel
If the puncture is in the back tire, it's easier to remove the bike past turning the wheel upside down and resting it on its seat and handlebars. Using the wrench, loosen the nuts belongings the wheel just enough that the wheel tin exist slipped out of the forks. If you are removing the back cycle, y'all will have to pull the chain and dérailleur out of the way so that the bike can exist removed.
Some bicycles accept quick-release clamps which enable the wheel to be removed by pulling on a lever. Pull the lever out from the bike and downwards. Forks have so-called "lawyer lips" which act as a backup to prevent wheels dropping out if the lever inadvertently loosens, so yous will likely need to agree the lever and loosen the round "nut" on the far side of the bike to provide enough slack to remove the wheel.
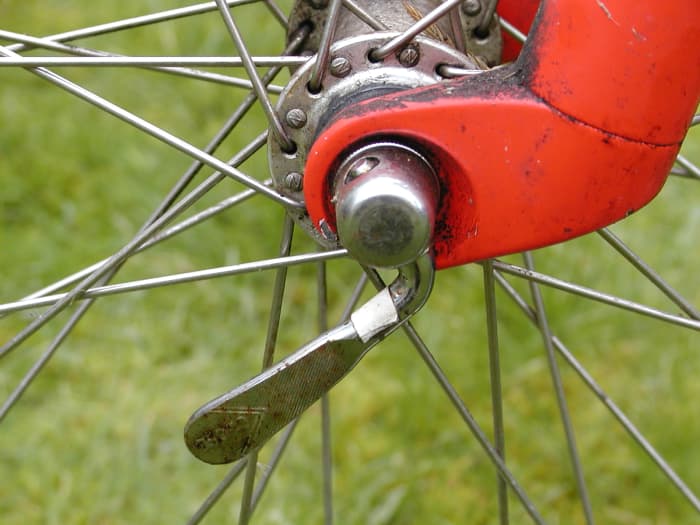
Some wheels are held on by quick release levers. The lever volition hang downwards when loosened. Push it back upwardly parallel and in line with the fork when re-tightening.
© Eugene Brennan
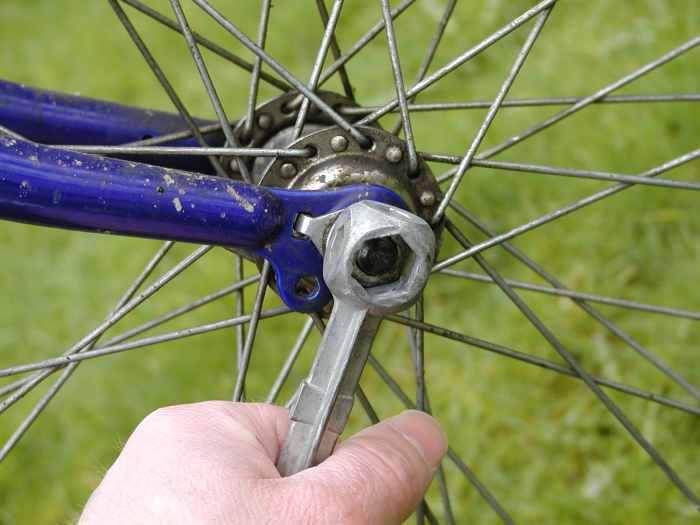
Undo bicycle nut with the wrench
© Eugene Brennan
Pace three: Release the Air From the Tube
Remove the cap from the tire valve. Employ something to push in the fundamental pivot on the valve: a piece of stick or match, or anything that comes to hand. This releases the air from the tube.

Release the air from the tube
© Eugene Brennan
Step four: Marker the Tire
It's quite likely that the object which caused the puncture is still stuck in the tire. If information technology'due south a thorn, the chances are that it'due south pushed into the thread and yous won't be easily able to find it, peculiarly in low lite weather condition. Still, aligning the puncture point in the tube with the tire narrows down the location where the tire was pierced.
Earlier yous remove the tire, mark it with chalk in line with the tire valve. Once you've patched the tube, then just lay the tube on the tire, lining up the valve with the chalk marker. Any punctured the tire should and then be close to this patch (if it's still lodged in the tire).
If you reinstall the tube without doing this, you hazard getting another puncture from whatever is stuck in the tire.
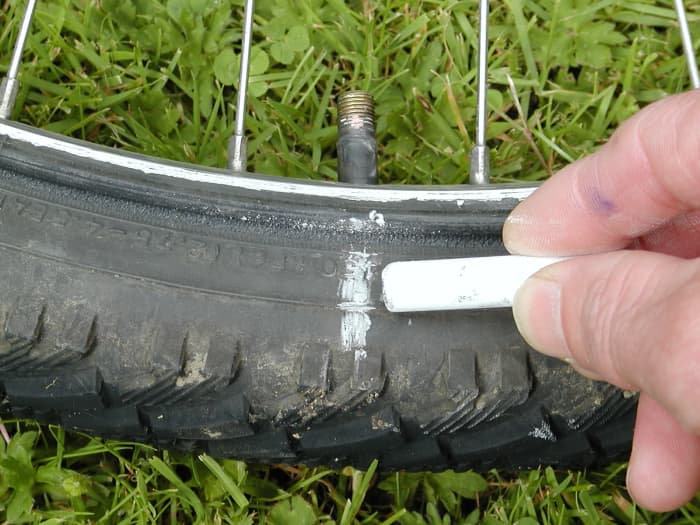
Marker the tire in line with the valve. One time you find the hole in the tube, this allows you to align tube and tire and so that the object which caused the puncture can be constitute.
© Eugene Brennan
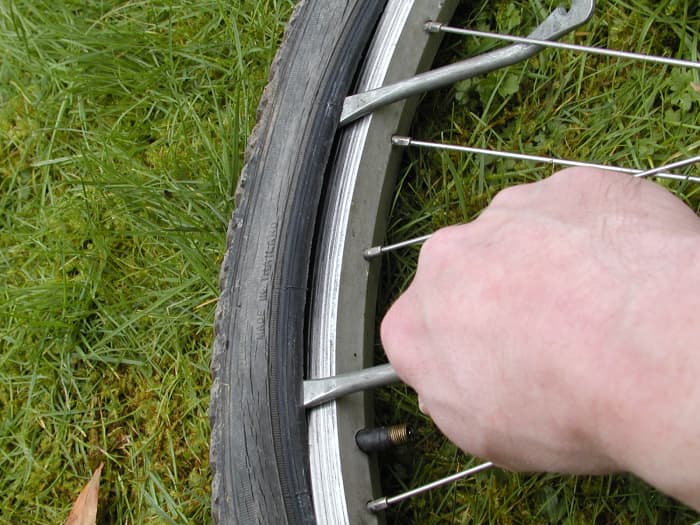
Footstep five: Remove the Tire From the Rim
Push button the blunt end of the tire lever in between the tire and rim. Don't push button it in too far every bit there is the danger of pinching the tube causing damage. Lever the beading (the edge of the tire) out from the rim. Hook the other end of the tire lever under a spoke. Insert a second tire lever about 4 inches away and lever out a further section of dewdrop.
It should at present be easy to slide the tire lever sideways along the circumference of the rim to divide more bead. If the tire is a tight fit or rigid in common cold weather, you may need to lever out further sections earlier you can slide the lever sideways. You tin also slide your fingers in betwixt the tire and rim and and then slide your hand sideways to expose more tire.
Y'all don't necessarily have to remove the tire completely from the bike. It should exist possible to slip out the tube through the gap between bead and rim.
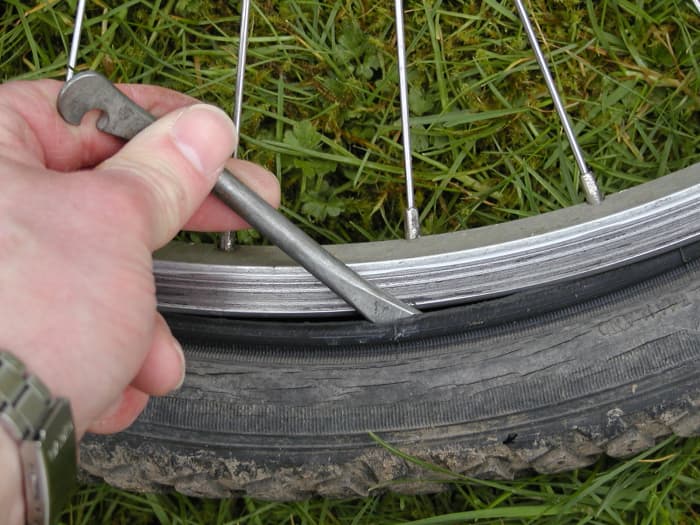
Apply the blunt end of the tire lever to lever the bead of the tire out from the rim
© Eugene Brennan
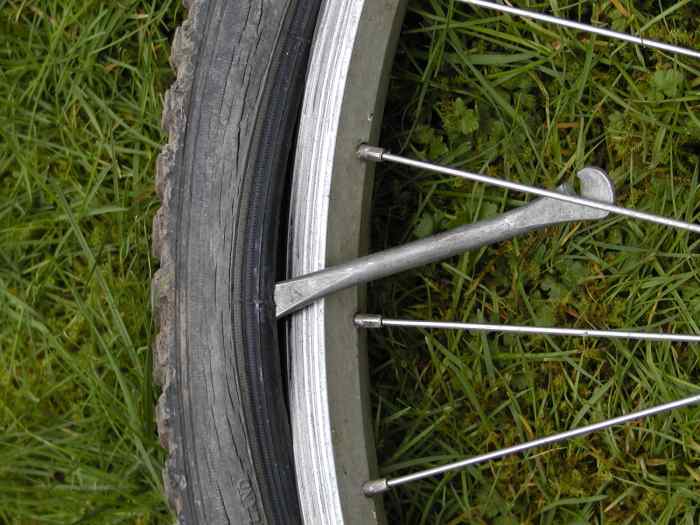
Claw the tire lever nether a spoke
© Eugene Brennan
Slide the tire lever along the bead to release it. You may need to lever out farther sections of the tire, bit by bit with the second lever earlier it is possible to do this, especially if the tire is a tight fit or rigid due to low temperatures
© Eugene Brennan
The tire levers that come in a patch repair kit are often cheap, flimsy plastic or thin metal strips. I similar these Tragoods premium tire spoon irons from Amazon considering they're like to what I use in the photos. They have a round-edged spoon tip and a thicker round stem and handle that's easy to agree. Also, they have a slot in the shaft for hooking around wheel spokes so that several levers can be in place at the same time.

Bicycle tire levers.
Amazon
Stride half-dozen: Remove the Tube
First, remove the valve from the rim, and then information technology should be piece of cake to remove the residuum of the tube from the tire.
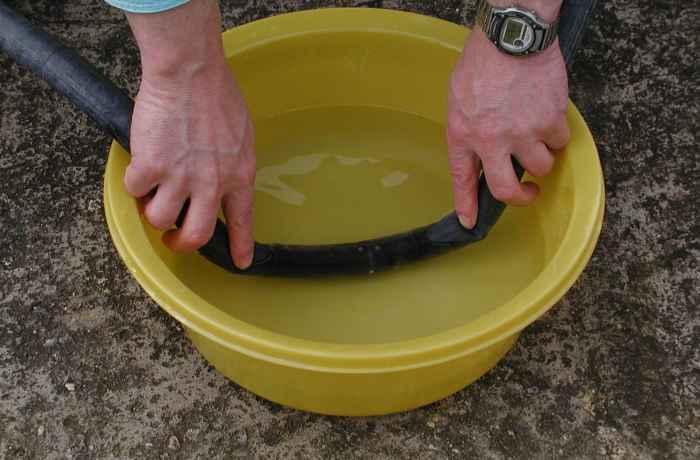
Step seven: Find the Pigsty in the Tube
If y'all are carrying a spare tube on your journey, you can skip this footstep, simply if non you demand to observe the pigsty in the tube. Pump up the tire until it is semi-inflated. If you are at domicile, you can and so observe the hole past submerging the tube in a basin of water, rotating it bit by bit through the water, and watching for bubbling.
If you're out in the countryside, you may be lucky and observe a pool or pool of water for doing the same thing. In one case you find the hole, dry the area and mark it with chalk. If you don't have access to h2o, concord the tube upwards to your face up and slowly rotate information technology until you experience air in your face.
Sometimes bad quality tubes tin can develop pinholes on the inner side of the tube ( i.e. the side which makes contact with the rim), so check this also. Again mark the hole with chalk.
You lot should see bubbles of escaping air indicating the position of the pigsty
© Eugene Brennan
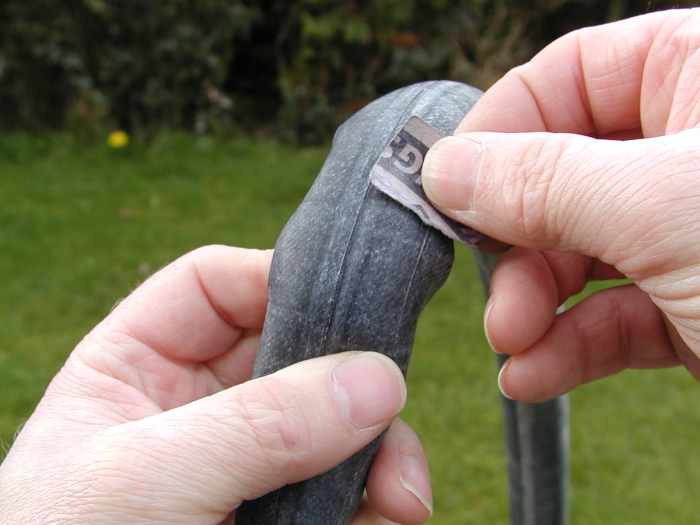
Step viii: Locate What Caused the Puncture
This is essential. The puncture may accept been caused past a piece of drinking glass, barbed wire, sharp stick, smash or whatsoever which didn't actually remain stuck in the tire. My experience with trail riding, nonetheless, is that all punctures were caused by pocket-sized thorns which lodged in the tire wall. So you demand to check if the offending item is nonetheless at that place, otherwise, you lot'll get a puncture in the same place.
Lay the tube on the tire, adjustment the valve with the chalk mark on the tire. If at that place's anything even so stuck in the tire, it volition be in line with the hole in the tube. I've had to do this in complete darkness with just the bike forepart calorie-free for illumination, so that's why information technology's wise to deport a caput torch with you.
You can too do this past feel, and slide your fingers sideways forth the inner surface of the tire. This is ok for thorns but probably not a skillful idea if a sliver of glass is stuck in the tire!
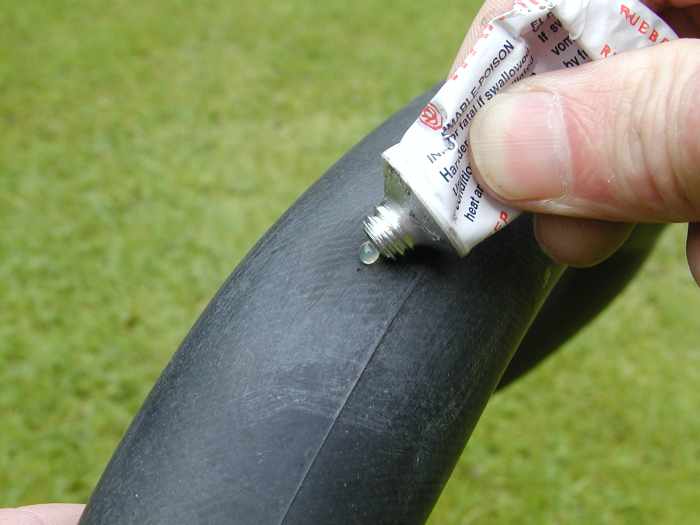
Footstep 9: Patch the Pigsty
Using the sandpaper, roughen an area of the tube slightly larger than the patch. Apply a blob of solvent/mucilage about the size of a small pea and spread it effectually with your finger to grade a sparse layer the size of the patch.
Allow the glue to become tacky to the bear upon, this normally takes about 5 minutes depending on temperature. Remove the backing foil or plastic from the patch. Apply the patch and heart it on the hole. Press down difficult on the center and push outwards to remove whatever trapped air.
Sandpaper the area around the hole to roughen it and ensure the patch bonds well to the tube
© Eugene Brennan
Squeeze out a blob of glue about the size of a pea
© Eugene Brennan
Spread mucilage over the sand papered area with your finger. Look for about 5 minutes until it becomes tacky
© Eugene Brennan
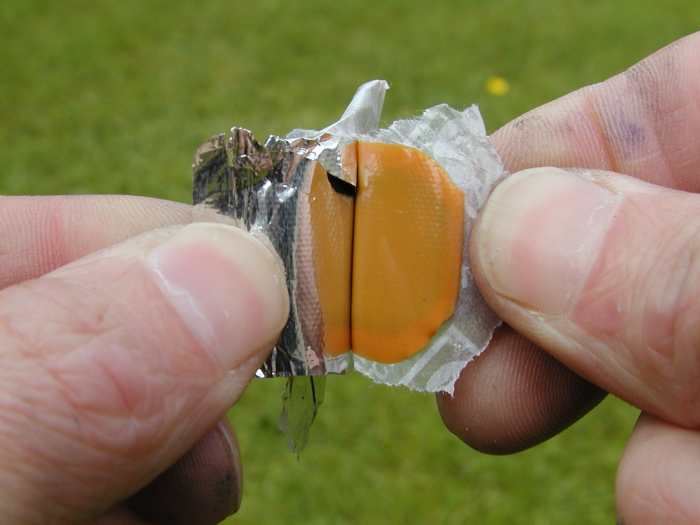
Remove the backing foil from the patch. Try not to touch the surface or get clay on it
© Eugene Brennan
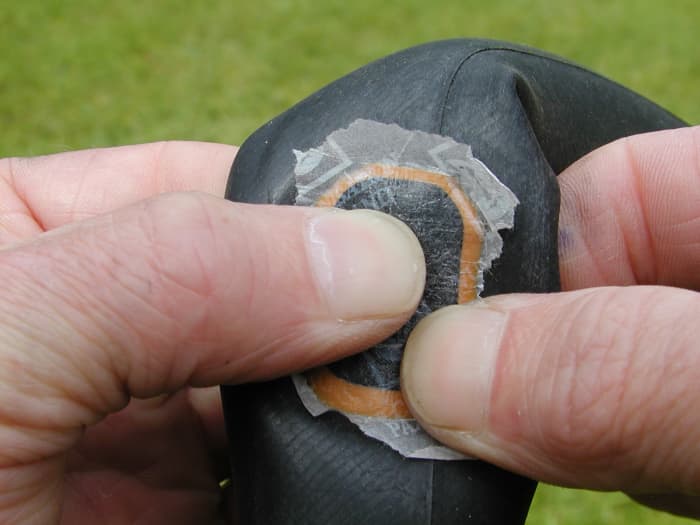
Push down hard on the center first and then towards the edges to miscarry whatsoever air. The paper (if fastened) helps to stop the patch sticking to the tire.
© Eugene Brennan
Can I Use Glueless Patches?
Yeah, you can also use cocky-agglutinative patches similar these ones from Amazon, however, they may not form as good a bond every bit a patch fastened with glue. Nonetheless, in an emergency, they're perfectly expert for getting you lot home. Glue-on patches grade a significantly stronger bail with the tube for a permanent repair.
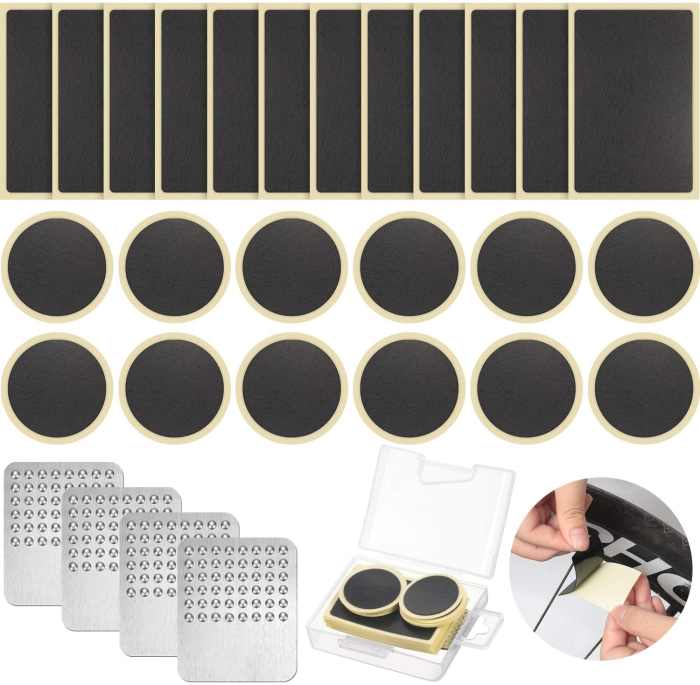
Glueless patches for bicycle tires.
Amazon
Stride 10: Put Everything Dorsum Together
- Inflate the tube just enough to remove the limpness. This helps to button the tube far enough back against the wall of the tire and so that it doesn't get caught between the tire and rim.
- Identify the rim apartment on the ground and lay the tire down on top of it.
- Bank check the treads on the tire are facing the correct way (Y'all did check which way they go before you removed the tire?!) If you didn't, the treads which are often 5-shaped usually betoken back towards the pedals on the bottom of the bicycle for the forepart tire and vice versa for the rear. However, the direction a tire should turn is often embossed into the rubber of the tire wall, or printed on it.
- The two sharp internal edges of the tires are called beads. Insert the bead closest to the ground into the bottom edge of the rim of the wheel. Fit the section of the tube with the valve into the tire first and thread the valve through the hole in the rim. Continue to feed the tube into the tire.
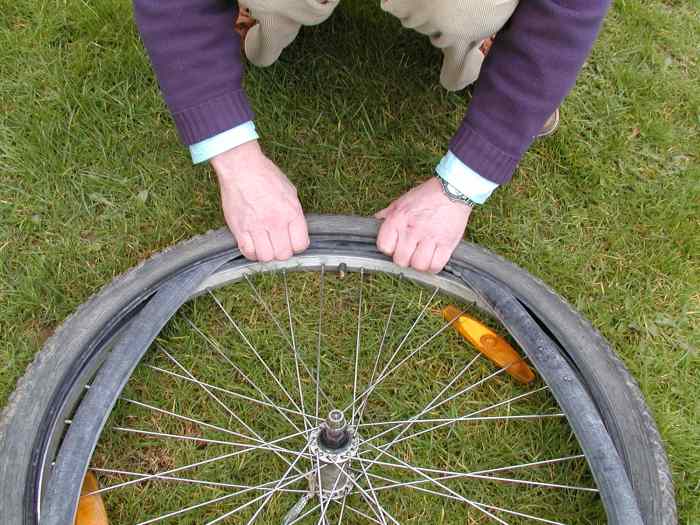
Now use your two thumbs or fingers to strength the upper bead of the tire bit by bit into the rim. Information technology might be easier to do this with the tire held vertically. This can be a little difficult as you get to the final section of the bead. You can utilise a tire lever to lever the dewdrop into the rim as shown in the video below (similar to how you levered it out, but in reverse). Be careful you don't nip the tube with the lever.
- Inflate the tire while checking that the tire valve is at right angles to the rim. If it isn't, right this by sliding the tire on the rim. Keep to inflate the tire to the rated pressure. Replace the bike into the forks of the bike taking note of which style the thread points.
Next, tighten the nut which holds the wheel in place. If your wheel has a quick-release lever, clench the lever upwards, parallel to the forks so that information technology is out of the way. This takes a fiddling bit of trial and error and the whole arrangement should be so tight that you demand to wrap your fingers around the fork and utilise your pollex and palm to push the lever airtight. Lastly don't forget to replace the restriction cable on the restriction arms.
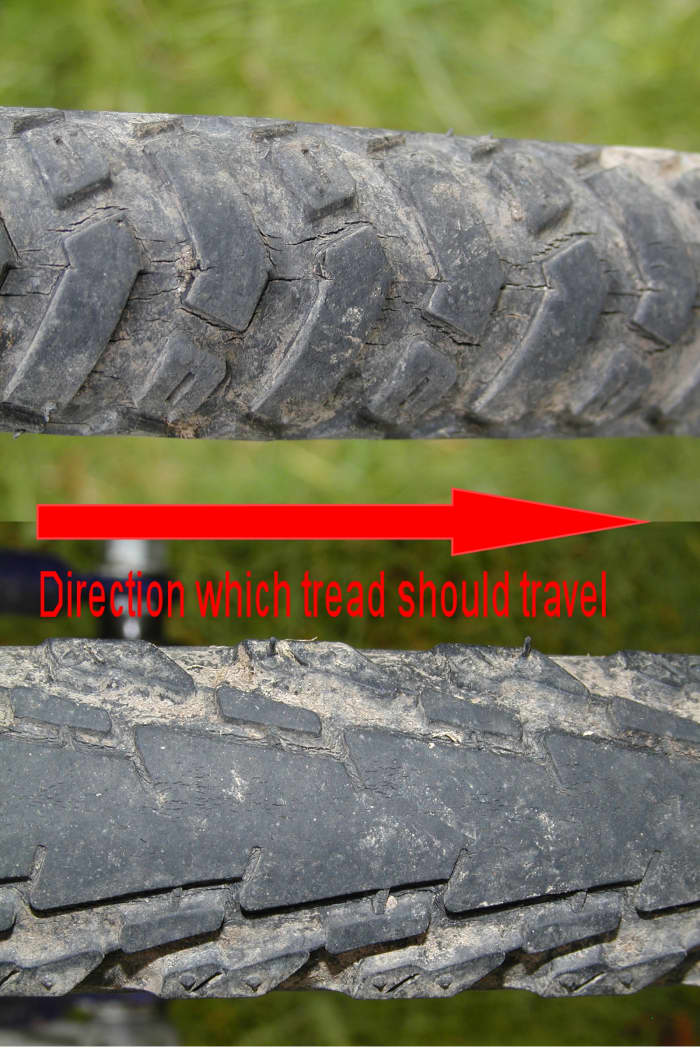
Usually the front tire turns in the direction the "vs" of the thread point, and vice versa for the rear, just roll direction is oftentimes embossed on the side wall of the tire.
© Eugene Brennan
Feed the tube into the tire and thread the valve through the hole in the rim
© Eugene Brennan
Replacing the Tire
Using Levers to Feed Tire Bead Back into Rim
Schwalbe Landcruiser Puncture Resistant Bicycle Tires
I use Schwalbe Landcruiser puncture resistant tires on my mountain wheel and I haven't had whatsoever thorn punctures this year (or whatever for that thing). The tires have an integral Kevlar layer which helps to prevent penetration.
The middle section of the tire tread or rib is quite slick (smooth), so rolling resistance is reduced, making for easier riding on roads. The outer section has chunkier treads and this gives a ameliorate grip on dingy roads / off-route. These tires are bachelor in 1.75 inches or 2 inches for standard 26-inch MTB wheels (other diameters also available).
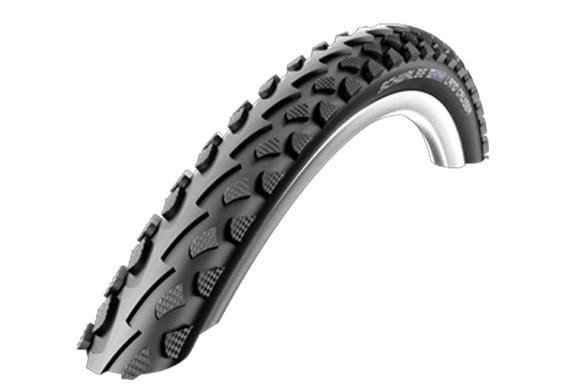
Schwalbe semi-slick puncture protected mountain bike tire.
Paradigm courtesy Schwalbe
What to Do If Y'all Get a Blowout
Cheque your tires regularly for any cracks or bulges, especially if they are old or take a lot of mileage. Rubber cracks naturally with age as a result of oxygen and UV exposure fifty-fifty if tires haven't been used. (Store tires in a cold dark place). Stones and potholes on roads and trails bruise tires leading to damage. Bulges bespeak damage to the nylon reinforcement of the tire and are a sign of an impending blowout.
A blowout is a failure of the tire as the pressure of air in the tube forces information technology through the tire wall or tread. You may hear a sudden gush of air equally the tire slowly deflates, or the event can exist more catastrophic, with a blindside and rapid deflation. This can rip a bigger pigsty in the tire and inevitably the tube may be damaged to the extent that is unrepairable. So always carry a spare tube with you.
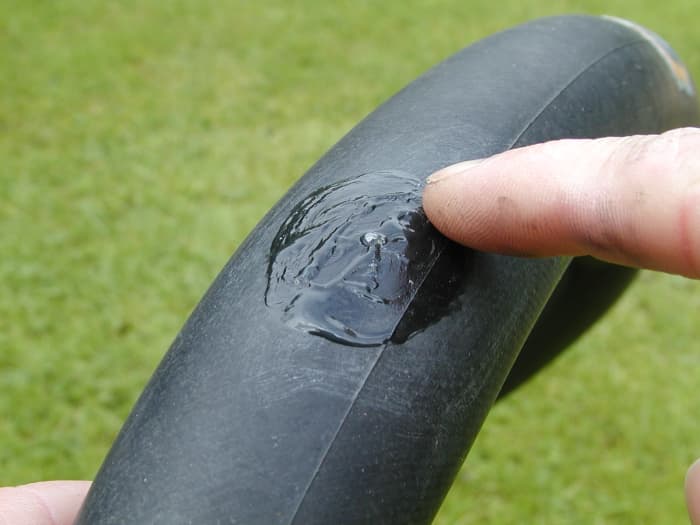
One time the tire is damaged past a blowout, there's no betoken trying to inflate a new tube within it until you block the pigsty. It's a good thought to bring a department of the old tire with you and this tin be used to embrace the hole within the tire at the site of the blowout (Assuming it'south not a huge tear or pigsty). This prevents the tube from pushing out through the pigsty when it'southward inflated. Inflate the tire to the minimum pressure and this should get y'all home! Don't utilize the tire again, supercede it!
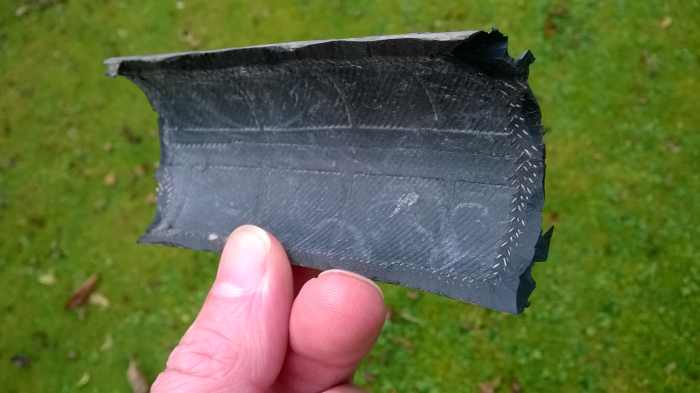
Department of erstwhile tire
© Eugene Brennan
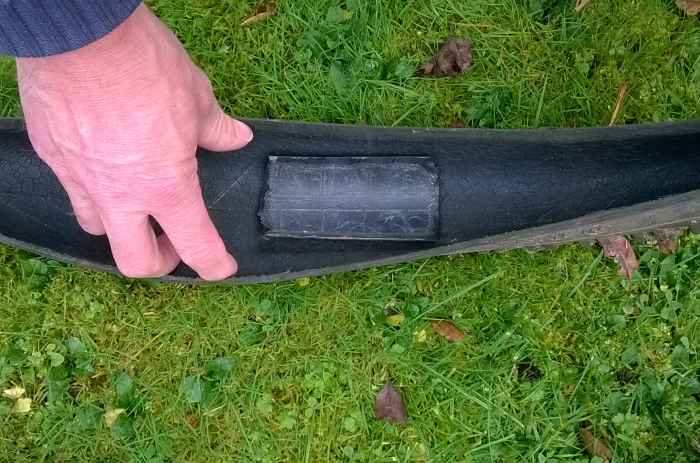
Cover the expanse of the blowout
© Eugene Brennan
Recommended Hand Cleansers
Working on a bike is a filthy chore and you lot'll inevitably become lots of muddy grease, oil and black grime from the wheels on your hands. If you dispense with gloves and work barehanded (which ofttimes happens because it'due south hard to handle small parts with gloves), an annoying hand cleanser will do a much meliorate job than soap at removing crud and is pretty much essential.
I utilize Dreumex anti-bacterial Pumice Heavy Duty Manus Cleaner, available from Amazon for removing oil and grease from my hands. It'southward also adept for removing oil pigment, tar, soot and general garden grime. (even used it in one case for taking black wheel grease out of a white carpet!)
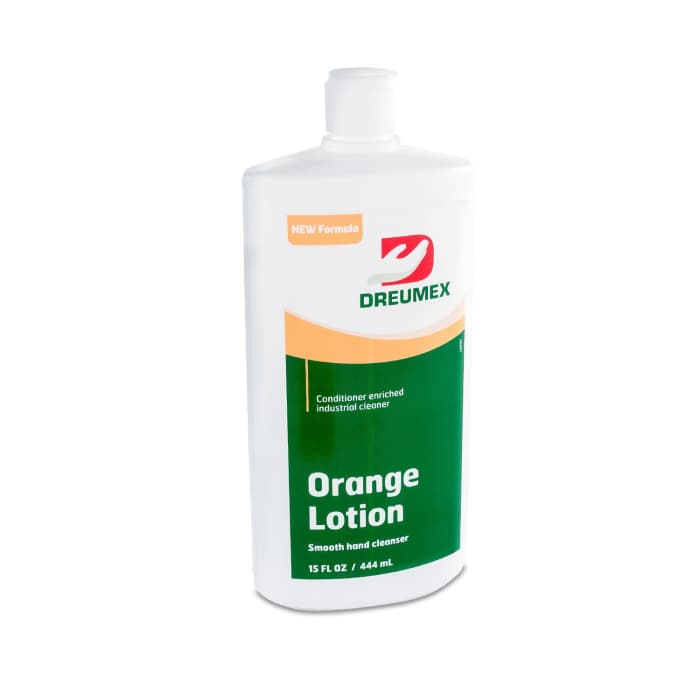
Dreumex Pumice Heavy Duty Hand Cleaner Orange Lotion Canteen
Amazon by permission of Dreumex
Tire Force per unit area
Max tire force per unit area for a mount bike by and large ranges from 50 to 65 pounds per foursquare inch (PSI).
58 PSI approximately equals 4 bar = 400 kPa. Less pressure gives ameliorate traction, just it's more difficult to bicycle when tires are softer.
Pressure Conversion: 1 bar = 14.5 psi = 100,000 pascals or 100 kPa
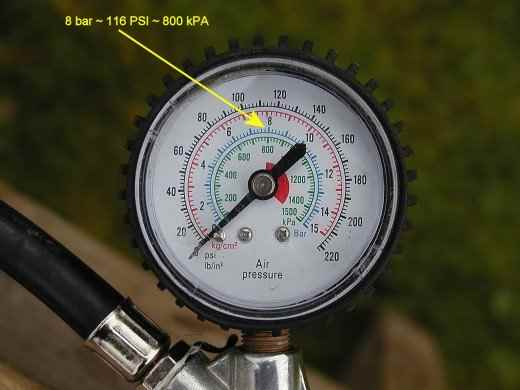
The blue calibration is bar, the outer scale is PSI, the green calibration is kPa
© Eugene Brennan
BE Safe!
Call up always habiliment high-viz reflective wear when cycling. If you have to repair a puncture, move to a location well in from the border of the road, where yous're safe from passing traffic. In the urban center, repair the puncture on the pavement, but if you lot're out in the countryside, discover the nearest gateway.
This content is authentic and true to the best of the author's noesis and is not meant to substitute for formal and individualized advice from a qualified professional person.
© 2022 Eugene Brennan
victoria from Hamilton On. on November 26, 2022:
Cracking info! I promise I never have to practice it,just one never knows!
I'm putting this hub in my favorites for study in better weather.
Thanks.
Gordon D Easingwood from Wakefield, United kingdom of great britain and northern ireland on March 08, 2022:
Good hubs been years since I have had to do this

How To Repair Hole In Bike Tire,
Source: https://skyaboveus.com/cycling/Repairing-a-Bicycle-Puncture
Posted by: parkerhisevout.blogspot.com
0 Response to "How To Repair Hole In Bike Tire"
Post a Comment